

Company settings opens only for people with the Manage company permission, so the company-level connections below are an admin job. See Team management for the permission matrix.
Google Analytics and Search Console
Each project connects to Google Analytics and to Google Search Console separately. The Integrations tab has a tile for each, with its own Connect button and its own Google consent screen asking for a single read-only permission. You can connect either one on its own.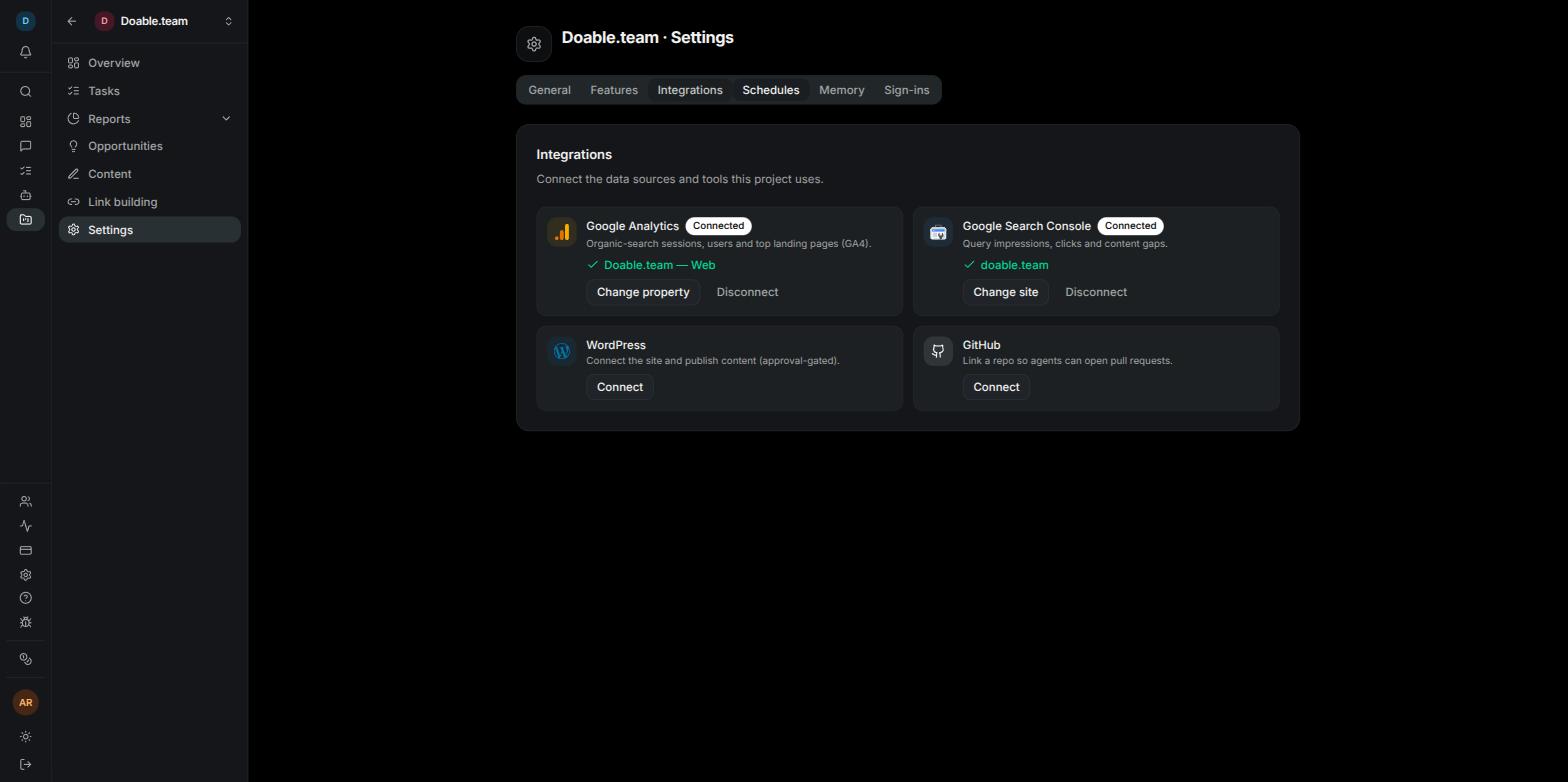
Settings → Integrations: a tile per data source, each with a status badge and its own buttons.
1
Open the project's Integrations tab
Open the project from the sidebar, click Settings, then Integrations.
2
Click Connect on the tile you want
You are sent to Google. Sign in with the account that can see the property or site and click Allow.
3
Pick the property or the site
You come back with the badge Choose property (Analytics) or Choose site (Search Console). Click it and pick from the list: GA4 properties are grouped by Analytics account, and Search Console lists only verified sites with your permission level on each. A toast confirms Property selected or Site selected.
4
Read the report
The tile turns to Connected with the property or site name. Open Reports → Organic Traffic to see the data. See Organic traffic.
Only the teammate whose Google account made the connection can change the property or site — Google only lists what their account can see. Other people see a disabled button and the reason: “Only [email protected] can set this property. Disconnect and reconnect with your own Google account to manage it yourself.” Anyone with Manage integrations may disconnect.
When a Google connection stops working
A red Reconnect badge, or an inline message such as “Google Analytics read access was never granted. Reconnect and choose Allow on Google’s screen.”, means data has stopped arriving. Click Reconnect and approve on Google. If a connection is switched off after repeated errors, the tile reads “Disconnected automatically — Google Analytics data has stopped updating.” and the people who can fix it get a notification in the Inbox. Disconnecting removes your Google connection for that product across the whole Company and clears this project’s selection. Other projects that relied on it fall back to another teammate’s connection if one exists.WordPress
Pair a project with your WordPress site through the official Agentic SEO for Visibility plugin. No WordPress password or application password is involved — the plugin and Visibility pair with a short code.
The WordPress card on the project's Integrations tab.
1
Install the plugin
In WordPress, install and activate Agentic SEO for Visibility from wordpress.org. It needs WordPress 6.0 or newer and PHP 7.4 or newer.
2
Generate a pairing code
In Visibility, open the project → Settings → Integrations and click Connect on the WordPress card, then Generate pairing code. The code looks like
VIS-A7K9-XB. It works once and expires after 10 minutes — click Generate another if it lapses.3
Paste it into the plugin
In WordPress admin go to Agentic SEO → Connection, paste the code into Pairing code and click Connect.
4
Check the card
Back in Visibility the card reads Connected with the site name and the line “Publish requests are approved in Inbox → Approvals.”
Your own DataForSEO keys
SEO data sources are listed company-wide under Company settings → AI clients → Data providers, not per project. Each row runs either on Visibility Data — the platform’s own account, included and metered to Credits — or on your keys, which run on your own account and are not metered.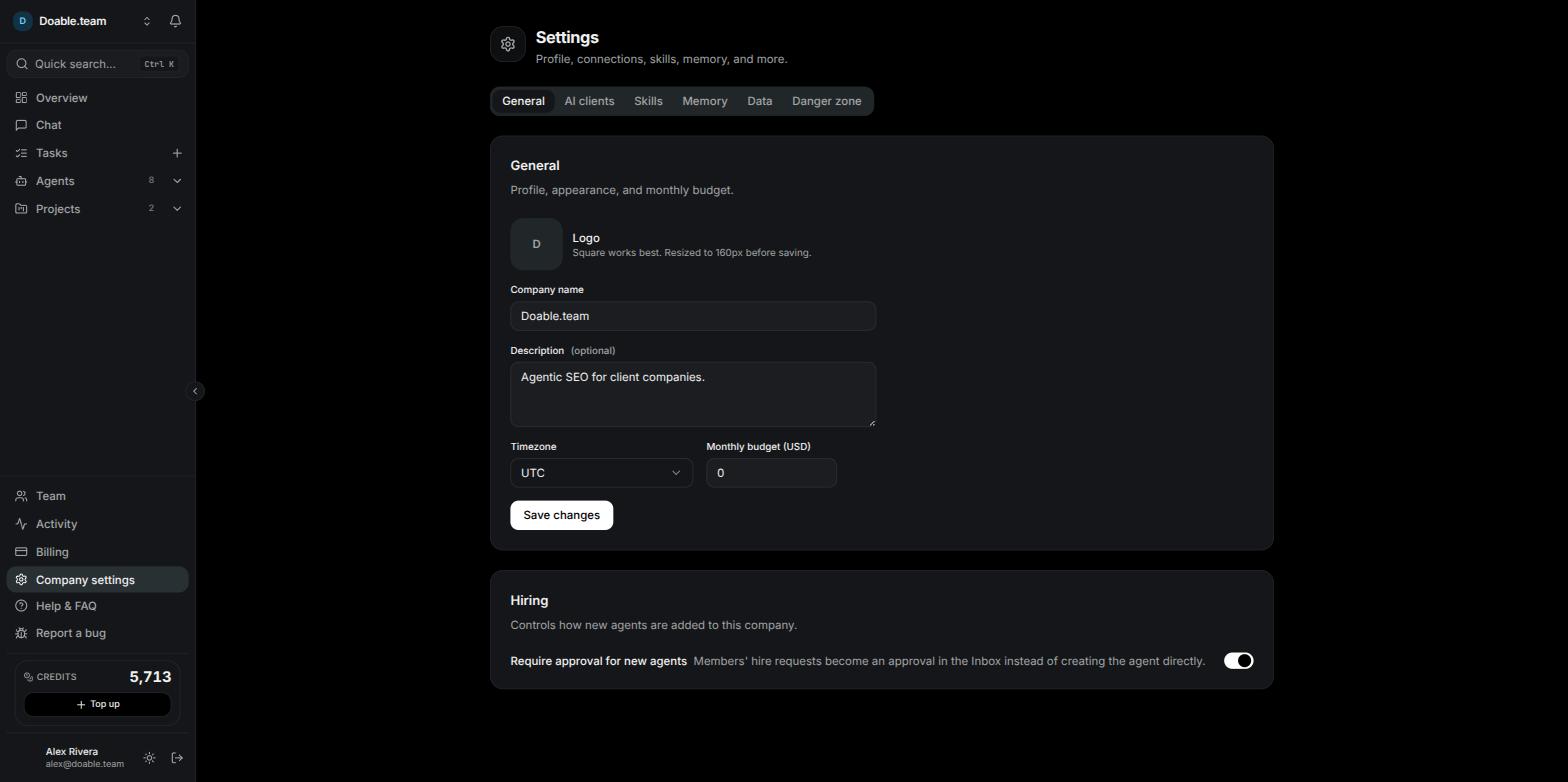
Company settings holds the company-wide connections: AI clients and Data providers.
1
Open Data providers
Go to Company settings → AI clients and scroll to the Data providers card.
2
Add your credentials
On the DataForSEO row click Connect Your Keys, enter your DataForSEO API login and password, and click Save keys.
3
Confirm the switch
Read “Stop using Visibility Data? … DataForSEO calls will run on your account (and won’t spend credits). You can switch back anytime.” and click Use my own keys.
4
Check the badge
Visibility tests the key straight away. The badge becomes Your keys · connected, or · connection error with the reason. Use Test any time, Replace keys to enter new ones, or Use Visibility Data to move back to the included lane.
Connecting your own key moves keyword metrics (volume, difficulty, CPC), competitor keyword data, backlink data and on-page crawls onto your DataForSEO account, where nothing is metered to Credits. Rank checks are the exception: they always run on Visibility Data and still cost Credits per keyword per check. See Credits and BYOK.
Your own AI clients
Every agent runs on an AI client plus a model. Visibility AI is the managed option: there is nothing to connect, and its usage is metered to your Credits. You can also connect your own accounts under Company settings → AI clients, and any agent set to that client is then billed by your provider rather than in Credits.1
Start the connection
On the client’s row click Connect. A Connect dialog opens for that client with a countdown, Finish within m:ss.
2
Sign in with the provider
Use Copy or Open on step 1 to open the provider’s sign-in page in a new tab. If the dialog shows a code, enter it on that page; if it asks you to paste the code the provider gives you back, paste it and click Connect. Otherwise just wait — “Waiting for you to authorise on the page…” finishes on its own.
3
Confirm
A toast confirms that the client is connected, and the row turns green with the connected account on it.
Agent email accounts
Outreach agents send from a real mailbox you give them. Open the agent, then its Mail tab: “Email accounts this agent can send from.”- Gmail
- Any SMTP server
Fill in Label, Gmail address, an optional From name and a 16-character App password, then click Add Gmail account. Sending and reply detection are configured for you.Google refuses your normal password. Expand How do I get an app password? for the steps, or create one at myaccount.google.com → Security → 2-Step Verification → App passwords. 2-Step Verification must be on for the account.
Without inbound (IMAP) details the card reads “No IMAP — replies won’t be detected” and follow-up sequences run to the end of their plan. With them, a reply stops the sequence and wakes the agent to answer. An account whose sign-in is refused disables itself, stops its sequences and raises a notification — fix the credentials and switch it back on.
Sign-in providers
Your own account can sign in with Email and password, Google and X. Open the Account dialog from your name at the bottom of the sidebar and read the Sign-in methods card: each tile shows Connected (with the date it was linked, for Google and X) or Not connected. The card is informational — there are no Connect or Disconnect buttons. To add Google or X, sign out and sign back in with Continue with Google or Continue with X using the same confirmed email address, and the provider is linked automatically. To add email and password to a Google- or X-only account, use Set a password in the same dialog. See Your account.Troubleshooting
The Google picker is empty
The Google picker is empty
Search Console lists only verified sites (“No verified sites on this Google account.”) and Analytics only GA4 properties (“No GA4 properties on this Google account.”). Sign in with a different Google account, or ask the site owner to grant your account access in Google first.
The pairing code expired
The pairing code expired
Codes work once and last 10 minutes. Click Generate another in the Connect WordPress dialog and paste the new one.
An agent cannot post to WordPress
An agent cannot post to WordPress
Check that the task’s project has a paired site, and that the agent’s Access tab grants WordPress. Even then, every publish waits for an Approval in the Inbox.
DataForSEO calls fail after you add your keys
DataForSEO calls fail after you add your keys
Click Test on the row to see the error. If your DataForSEO account restricts access by IP, contact support for the address to allow, then test again.